Concrete projects require the correct tools to achieve consistent results. Mixing, pouring, and finishing each need specific equipment, and attempting these tasks without the right tools often produces weak or uneven outcomes.
Many DIY builders face issues such as cracks, surface defects, or poor strength when essential tools are not used. Using substitutes can slow down the work and create quality concerns that require additional time and materials to fix.
Concrete tools are designed to provide accuracy and efficiency at each stage. From preparing the mix to levelling and finishing, they support the correct process and reduce the risk of defects. This guide outlines the essential tools needed for DIY projects and explains how they contribute to stronger, longer-lasting results.
Mixing Tools
The first stage of any concrete project is preparing the mix to the correct consistency. The strength of the finished product depends on accurate proportions of cement, sand, aggregate, and water. Having the right tools for mixing prevents weak spots and uneven surfaces.
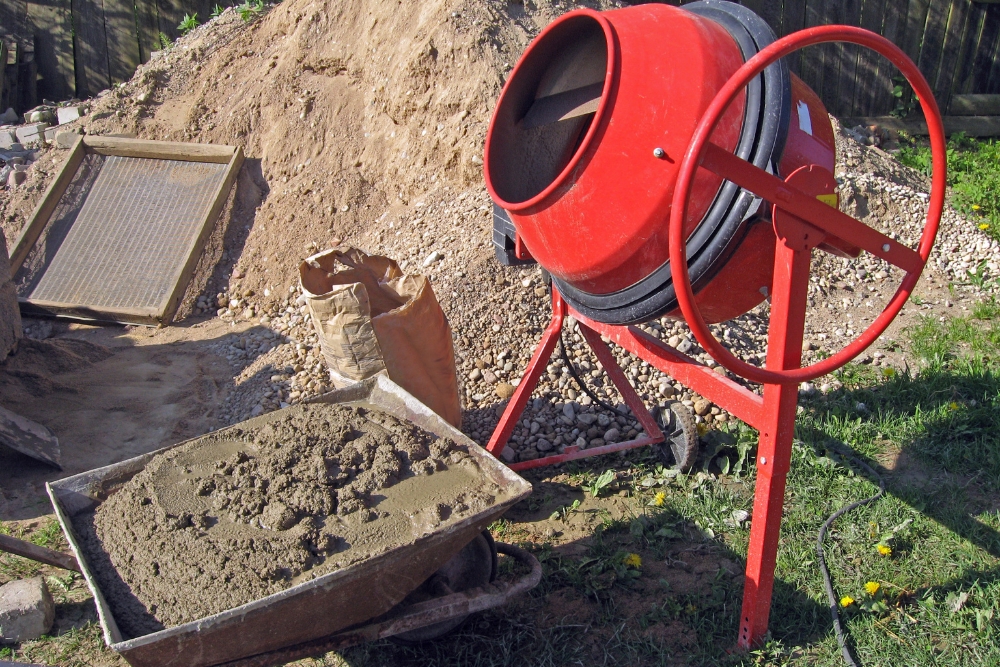
For small DIY jobs, a strong wheelbarrow and shovel are often enough. The wheelbarrow acts as a mixing tray, while the shovel combines the materials. This method suits minor repairs or small areas such as garden edges.
For medium to larger projects, a portable concrete mixer is more efficient. Mixers ensure all materials are blended evenly and save time compared to hand mixing. They also reduce physical strain, making it easier to maintain consistency across multiple batches.
Buckets and measuring containers are also important for accuracy. Adding too much or too little water affects the strength and durability of the concrete. Using a consistent measurement process helps avoid these problems and produces a reliable mix.
Choosing the correct mixing tools for the size of the project improves quality and avoids unnecessary rework once the concrete has set.
Pouring and Placing Tools
Once the mix is ready, it needs to be placed quickly and evenly before it begins to set. The tools used during this stage make a difference to how well the concrete spreads and compacts in the formwork.
Buckets and wheelbarrows are commonly used to transport concrete from the mixer to the site. For small DIY projects, this method is practical and allows controlled placement. Larger pours may require more frequent transport, so multiple wheelbarrows are often used to keep the process moving without delay.
A concrete rake, sometimes called a come-along rake, helps spread the mix across the formwork. Unlike a standard garden rake, it has a flat blade that pulls the material without separating aggregate from the cement. This ensures a consistent surface ready for levelling.
Tamping tools are used to compact the concrete and push out air pockets. Proper compaction increases the density of the slab and reduces the chance of voids that weaken the finished surface. Hand tampers are enough for small areas, while larger slabs may benefit from mechanical options.
Having the right pouring and placing tools ensures concrete fills the forms correctly and sets to the intended strength.
Levelling and Smoothing Tools
Once the concrete has been placed and compacted, the surface must be levelled to achieve the correct thickness and finish. This step is essential because uneven slabs can lead to structural weaknesses or surface defects.
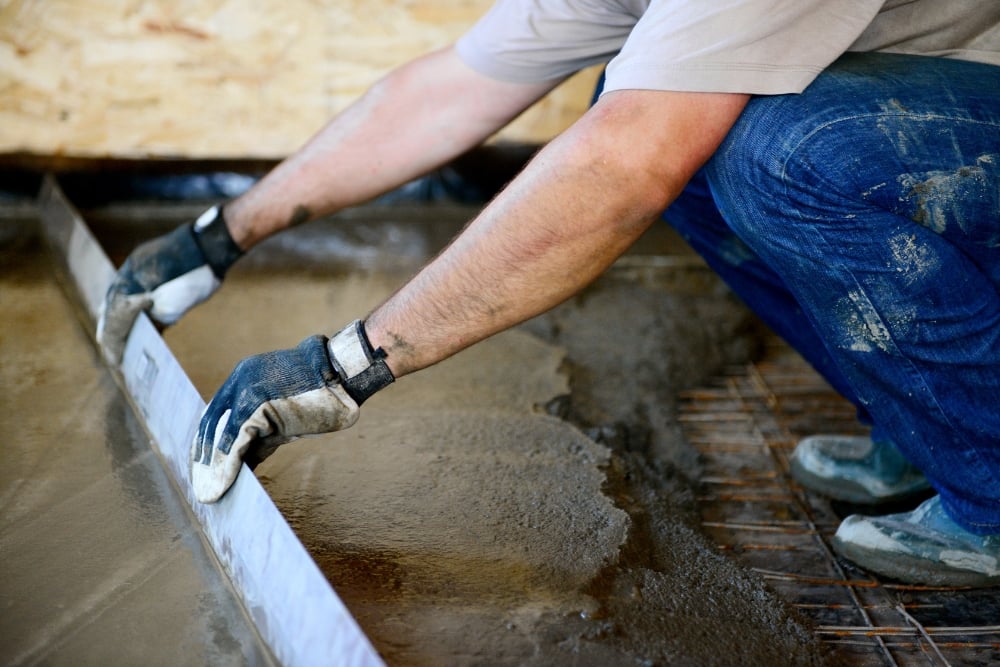
The screed is one of the most important tools for this stage. A screed is a straight, flat board or metal bar pulled across the top of the formwork to strike off excess concrete and create a level surface. For DIY projects, a timber screed or aluminium straightedge is usually sufficient. On larger slabs, two people may be needed to draw the screed evenly across the pour.
After screeding, a bull float is used to smooth the surface and push down coarse aggregate, leaving a paste of cement and sand at the top. This creates a base for later finishing work. The long handle allows access to the slab without stepping onto wet concrete.
Hand floats are then used for smaller areas and edges. They refine the surface further and prepare it for edging and finishing tools. These steps make the slab consistent in depth and appearance while reducing defects once it sets.
Edging and Jointing Tools
Once a slab has been levelled and smoothed, attention shifts to the edges and joints. These areas need proper tools to prevent chipping, cracking, and uncontrolled movement in the concrete as it cures.
An edging tool shapes and compacts the slab edges, reducing the chance of spalling or surface damage. Rounded edges are common for driveways, patios, and pathways because they are less likely to chip under foot traffic or vehicle load. Straight edges may be used where a clean, square finish is required.
Jointing tools, sometimes called groovers, cut control joints into the surface before the concrete hardens. These joints allow the slab to expand and contract naturally with temperature changes. Without them, random cracks may appear, weakening the structure. For small slabs, a hand groover is often enough, while larger projects may require a mechanical jointer or saw once the concrete has partially set.
Correct edging and jointing improve durability and appearance. These tools guide the slab as it cures, keeping cracks in controlled lines and protecting the perimeter from premature wear.
Finishing Tools
Finishing tools are used once the concrete has set enough to support light pressure but is still workable. This stage defines the final surface texture, appearance, and durability of the slab.
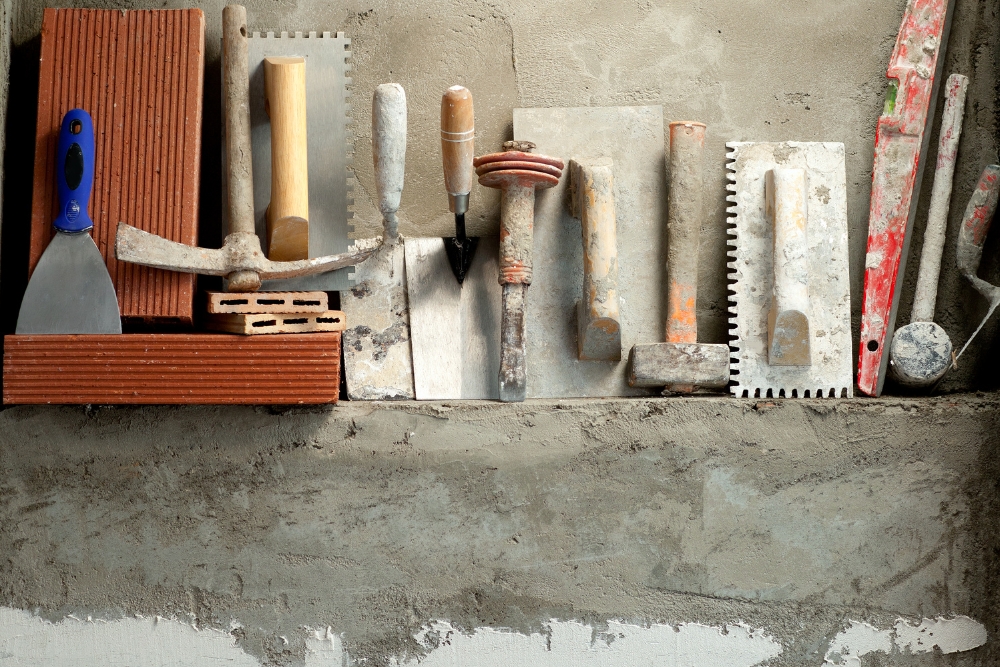
Trowels are essential for this process. A hand trowel is used for small slabs or detailed areas, while a power trowel is suited to larger projects. Trowelling compacts the surface paste and produces a smooth, dense finish that resists wear. The number of passes and the timing of trowelling influence the final appearance and should match the intended use of the slab.
For surfaces requiring slip resistance, brooms are drawn lightly across the slab to create fine grooves. This method is common for outdoor areas such as paths and driveways, where grip is important in wet conditions.
Other tools, such as edgers and groovers, may be used again during finishing to refine lines and joints. Applying sealers after finishing adds another layer of protection against moisture, stains, and surface damage.
Finishing tools determine both the look and long-term performance of the concrete, making them a critical part of any DIY or professional project.
Get the Right Support for Your Concrete Project
DIY projects become easier and more effective when the correct tools are used from start to finish. Mixing, pouring, levelling, edging, and finishing all require equipment suited to the scale of the job. Without these tools, achieving consistency and durability is difficult, and repairs may be needed sooner than expected.
For projects that go beyond DIY scale, concrete services provide access to professional tools, techniques, and expertise. Experienced contractors understand which equipment is needed for each stage and can deliver results that last.
At Con Ops, we support residential, commercial, and industrial concrete projects across the Hunter Region. From small slabs to complex structures, our team supplies the knowledge and services needed to complete work efficiently and to standard.
Frequently Asked Questions
What is the minimum equipment needed for small concrete jobs?
For very small tasks such as garden edging or patch repairs, a wheelbarrow, shovel, screed, and hand trowel are usually sufficient.
Can household tools replace concrete tools?
Household tools are not recommended. They may work temporarily but often damage the surface or fail to provide the compaction and finish required for durability.
Do concrete tools vary for indoor and outdoor projects?
Yes. Indoor surfaces often need smoother finishes achieved with trowels, while outdoor slabs may use broom finishes or grooved joints to reduce slip risk.
Are professional tools required for DIY work?
Not always. Many hardware suppliers stock smaller versions of professional tools, which suit residential projects. Larger or complex jobs may still need contractor equipment.